Inputs
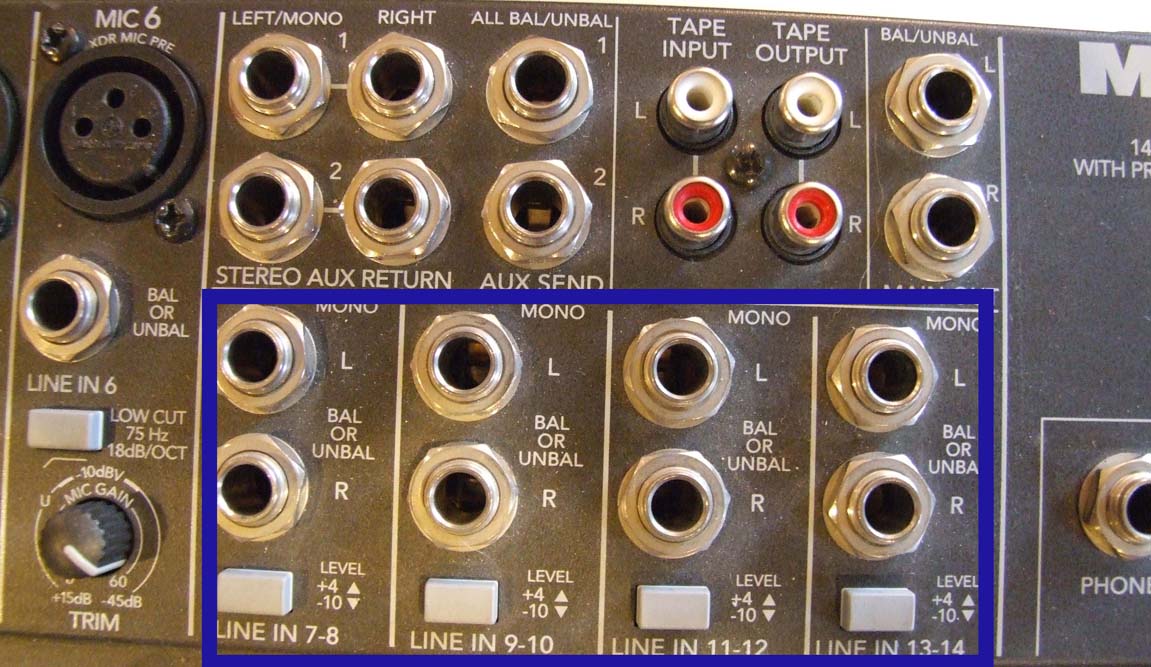
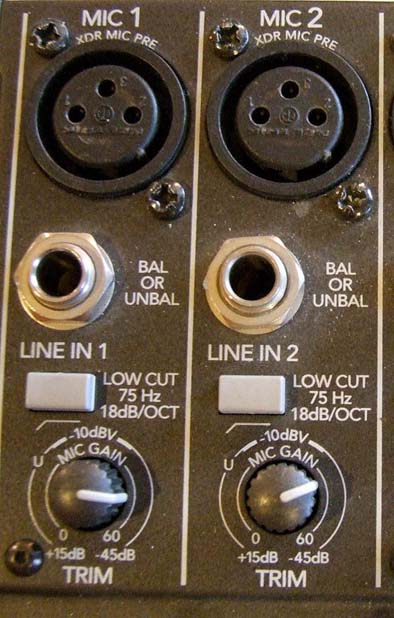 The board shown in our example has 6 XLR low impedance, balanced mic inputs; plus 4 more stereo/mono ¼-inch line inputs. Six mic ins are plenty for most productions.
48volt Phantom powering is available for the XLR mic inputs. A switch on the back activates Phantom powering for all 6 of the mic inputs.
Each input module is referred to as a "channel strip". In this instance, there are six identical (XLR) monaural strips; as well as four line-level only strips.
Below each XLR mic input is a ¼-inch jack for line level input. If you have a mic with a ¼-inch plug on the end of it – you CANNOT plug it in here. These jacks are for LINE LEVEL devices, such as audio decks, that do not require pre-amps the way that microphones do.
On the 4 sets of line inputs, you can plug in mono or stereo sources. A mono signal plugs in to the Left jack. A stereo source plugs into the left and right jacks, and both sides of the signal are uniformly controlled by the EQ and fader.
 Unless you are miking a panel discussion or musical variety show, you probably won't need more than six mic inputs for film/video work. The only time I have needed more inputs on a theatrical production was when I had a lot of radio mics working in addition to my wired microphones. Some radio mics give you the option of mic or line level output, so you may be able to use them in the line inputs of your board. You could also plug a tone generator into the line input of the mixer, assuming that most tone generators offer a choice of mic level or line level output.
There is a button on each strip for low cut. Using these buttons allows you to cut the low frequencies consistently, rather than dialing in a variable amount of bass cut with the equalizer controls. My recommendation is to use the low cut buttons on your mics always during exterior filming, and leave the buttons off during interiors. But if you use a panel that does not have a low cut button, use the EQ knob ¾ but be precisely consistent on where you set it, so that your takes will match from day to day.
Never adjust the low cut on a shot to shot basis to correct for the existing conditions on the set. Although it will improve the quality of that particular take (in your headphones), the audio will not match other takes shot over the duration of the production. You must be a creature of habit: use the same settings for all of your exteriors; and use the same settings for all of your interiors. It is not necessary for your exterior settings to match your interior settings, since people sound different outdoors than they do indoors.
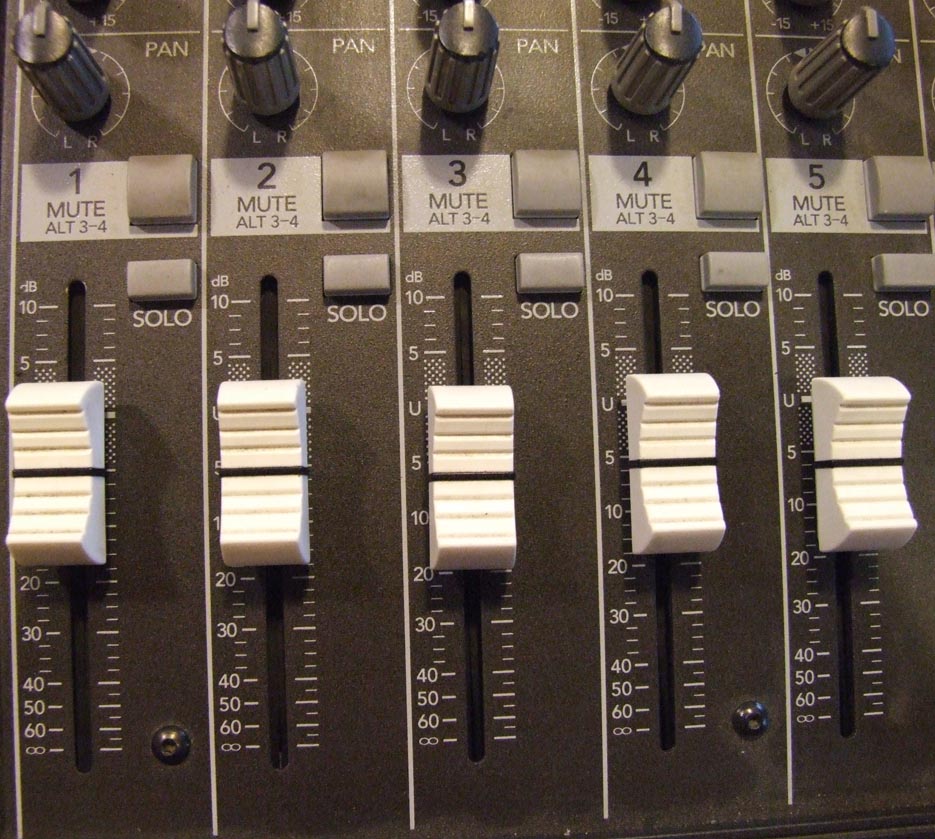 Each XLR input has two controls for the volume: a trim pot and a fader. The trim pot serves as a coarse adjustment, and the fader allows more subtle control. Use the trim pot to adjust for mic sensitivity and vocal intensity (whisper or loud voice).
To get ready for a take, leave the fader at the Unity position ("zero" setting, or about halfway up) and adjust the trim for an "okay, in-the-ballpark" level.
By using the individual trim pots, all of your mic inputs can be roughed out so that all of your faders go to the same height when your mics are open, eliminating the need to tape marks alongside the faders to indicate optimum setting for each actor. It sure beats the old way of having all of your faders open to varying heights and trying to keep track of them during rapid changes. By making your "home base" for the faders around halfway up, there is plenty of range for adjustment during a take for increasing or decreasing the volume of your actors.