Audio for Director, Script, and Others
It is a common practice to provide audio to key people on the set in addition to your boom operator. Use some sort of wireless system in order to avoid cable confusion. Besides, it is highly unlikely for your Director to stay in one spot very long!
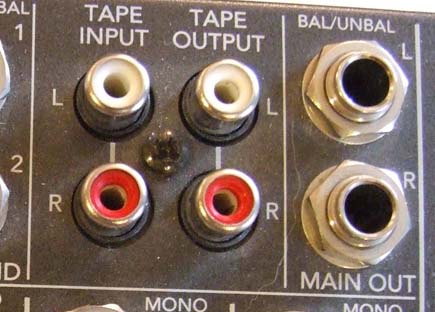 The wireless can be fed from the TAPE OUT (RCA jacks), Control Room outs, Main outs (you have XLR's on the back as well as ¼-inch on the top), or Aux Send. Lots of choices…
Output to the Recorder
As mentioned above, there are numerous ways of getting signals out of the mix board. The best method is to use the XLR balanced outputs on the back of the board.
Some mixing boards offer a choice of line level output or mix level output. Whenever possible, use the line level output rather than the diminutive mic level option, since it takes a lot stronger signal to cause interference at line level.
However, if your camcorder only accepts external MIC input, then be sure to depress the button near the XLR outs that will reduce the outgoing signal from line to mic.
Most mixing panels only offer line level outputs. In the event that your camera only has a mic level input, you will need special audio adapters or adapter boxes to convert your line level output to a mic level camera input.
The TAPE outs are convenient unbalanced RCA outputs, and may be convenient for some applications.
Metering
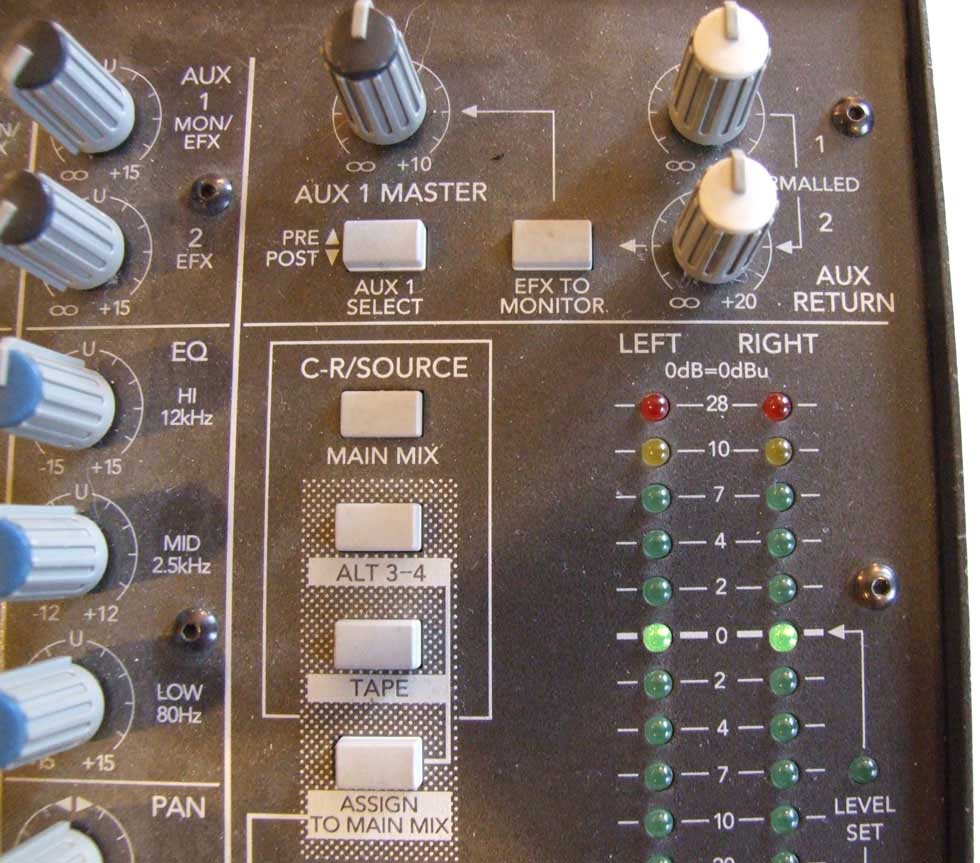 The LED meter on some of the popular mixing panels are more of a peak reading meter, than a typical VU meter as found on most other brands of lower end (music or PA) mix boards.
On a typical VU meter, average settings are at zero. Peaks in the soundtrack could be up to +10 VU. But on a peak reading meter, zero is considered the limit; with average levels being somewhat under.Â
The most important thing is to check where your output levels play on the recorder's meter. If a solid signal on the mixer's meter shows as too hot (or too low) on the recorder, then simply re-adjust the line level input knob of the recording device!
This "look and see" (record and play back) approach applies especially to video camcorders.
All meters read and react differently to dialog, so don't be so rigid in your ways that you fail to compensate. The only meter that really matters is the Recorder's!
Develop a consistent work habit in how you monitor both in your headphones as well as visually on the meter. Then experiment to see how your mixing panel settings best translate over to your recorders.
Some folks naturally mix a little hotter than others; and may find that they need to "tone up" with zero on their mixers going to a lower setting on the recorders. Or not.
 But do not ASSUME that the settings that work best for one person or one recorder will always work with others. Take a moment and do some experimentation.
In an emergency, a trick that I find works well enough is to compare the settings of the camera's automatic gain control with manual settings.
Auto Gain Control is notorious for pumping. The circuit is programmed to record average dialogue at average settings. But if the dialogue should exceed average levels (such as a shout), the circuit wants to lower the volume. If the dialogue should taper off to a whisper, then the circuit wants to raise it back to normal. And if the dialogue vanishes (a long pause), then the circuit tries to find ANY sounds or noise and raise them to dialogue level!
Not exactly a good thing. Which is why we do not normally deploy the Automatic Gain Control.
But we can fool it into telling us what level the manufacturer felt would be ideal for normal dialogue on their camera.
Have someone speak into a mic and just read a script or a newspaper. No shouts, no whispers, no pauses. Nothing that would upset the Auto Gain Control.
Mix it on the panel at your normal setting for plain dialogue. Probably a couple of notches (LEDs) under zero.
Send that audio to the camera and note the range on the camera audio meter that the Automatic Gain circuit puts the dialogue. Then, turn the camera back to Manual Audio and dial in the dialogue so that it is in approximately the same range.
Now, use your tone generator and send zero tone out of your mixer into the camera, and make a note of where the tone appears on the camera's meter.
In conclusion
Although mixing panels appear intimidating at first glance, they are really not all that complicated to operate. They afford smooth control over each mic or line input; provide a source of 48v Phantom mic powering; and allow us to blend multiple signals together as well as to assign those sounds to any of our available soundtracks.
Mixing panels facilitate monitoring of the sound tracks by talent (musicians, on-air reporters), the boom operator, Director, Client, or whoever.
The Aux Outs let us provide different versions of the mix for live audience listening as well as full recording.
Mixing panels are relatively inexpensive to purchase.
And they really look professional. Because they are.
This article was originally published by Student Filmmaker Magazine.