![]() Over the past several years, it has become ever increasingly common to record production tracks with a SMPTE timecode reference instead of the traditional 60 Hz sync pulse. This article is intended as an introduction and overview of the use of SMPTE timecode in conjunction with audio recorders.
Over the past several years, it has become ever increasingly common to record production tracks with a SMPTE timecode reference instead of the traditional 60 Hz sync pulse. This article is intended as an introduction and overview of the use of SMPTE timecode in conjunction with audio recorders.
Types of Timecode: Non-Drop vs Drop
 The original timecode system is known as non-drop frame, since it assigns a progressive number to every video frame (0-29). This is an accurate way of tracking individual frames, but caused a problem for video editors when they compared elapsed "real time" to "videotape time". Due to the fact that video actually runs at 29.97 frames per second and NOT 30 frames, editors discovered that they could be off by 3.6 seconds at the end of a one hour show.
In order to "synchronize" the clocks on the wall with the elapsed time counters in the edit system, video engineers developed drop-frame timecode, which works sorts of like a leap year in reverse. Two frame numbers are dropped or skipped every minute, except when the number of the minute ends in zero, such as minutes 00, 10, 20, 30, etc.
It is important to realize that the video frames themselves are not deleted. Only their numerical labels are affected.
Frame Rates
The standard timecode frame rate for SD or broadcast video is 29.97 fps. So called 24 fps (video) and most HD is actually 23.976 fps --NOT actual 24 fps. However, video shot with the intent of converting to film could actually be true (native) 24 fps.
Other rate options for film cameras include 24, 25, and 30 fps.
Which Frame Rate and Mode to Use
Most probably, you will be using 23.976 (aka 23.97 aka 23.98) timecode for all HD, 2K, 4K, etc. video projects; or true 24fps Native for sprocketed film (24fps) and electronic cinema (24fps). But always ask! (And the current industry standard for digital audio is 24bit/48k for any project that may be released as a DCP.)
If you are recording for an SD video shoot, then use whatever mode (drop or non-drop) that the videotape recorder is using. Traditionally, video intended for (Standard Definition) television broadcast prefers to use the drop-frame mode, for the (real time clock) reasons discussed above. But always check with the engineer or camera operator just to be sure.
Standard Definition Video (SD) records at 29.97 fps, so that would be the correct timecode speed for your audio recorder: match the settings of the master video recorder both in terms of 29.97 and whether or not to use drop frame or non-drop frame timecode.
However, if you are shooting in HD, the camera and timecode may be running at 23.976. Note that most video cameras mistakenly refer to 23.976 as 24, so make sure you verify the actual frame rate. Some of the higher grade cameras can run at a true 24. If you are, in fact, shooting at 23.976 -- then set your audio timecode rate to 23.976. If your recorder does not offer that option, then use 29.97 non-drop.
If you are recording audio for a film shoot, the settings are different.
Film style editors generally (but not always) prefer to use non-drop timecode for ease of keeping track of frames, since it eliminates confusion during post-production if dealing with complex special effects or when converting from edited video back to film. So unless otherwise instructed, use non-drop timecode on film shoots.
The traditional frame rate for recording audio that will be sync'd to film cameras is 30 fps, irregardless of whether the film camera is running at 24fps or 30fps! The reason for this is that the audio does not have to correspond to the film speed but rather to the video speed, since the editing is being done in video!
When the film is transferred to video (for editing), it is slowed down by one tenth of one percent. Video runs at 29.97. You cannot easily change a whole number such as 24 into a fractional number such as 29.97, unless you alter the speed by a fraction (0.1%).
Film shot at 24fps is slowed down so that it ends up at the equivalent film speed of 23.97, which is then converted in real time to 29.97 for video. The process involves what is known as a 3:2 pull-down, in which 12 half-frames (aka video fields) are created and added to the 23.97 frames, thus making a total of 29.97 frames. Every other picture frame is scanned or digitized with one extra field. Adding the 12 fields does not alter the running speed of the picture, since it is only slicing the same size bread into smaller slices, so to speak.
It goes something like this: 1,1,1, 2,2, 3,3,3, 4,4, 5,5,5, 6,6, 7,7,7, 8,8, 9,9,9, 10,10, 11,11,11, 12,12, 13,13,13, 14,14, 15,15,15, 16,16, 17,17,17, 18,18, 19,19,19, 20,20, 21,21,21, 22,22, 23,23,23, 24,24. If you count the extra fields, there are 12. So, two fields equate one frame; 24 frames plus 12 extra fields gives us our needed frame count to pad 24 into 30. (Actually, 23.97 becomes 29.97)
Film shot at 30fps film speed would end up at 29.97 film speed in video.
Back to the nuts and bolts. The picture shot in our film camera is slowed down during transfer to video. For audio to remain in sync, it must be slowed down by the same percentage. So if we record audio on the set at 30fps timecode, and then transfer it into the edit system at 29.97 fps (which also happens to be video sync) -- the audio will end up in perfect sync with the picture.
When the editing is completed, the audio will be speeded up from 29.97 to 30 in order to match back up with the actual film for creating release prints. But that is not your concern as a Production Mixer. The post production people and the film labs deal with that issue.
Therefore, unless instructed otherwise, the industry standard for production sound (film shoot) has been to set the timecode in your audio recorder to 30fps Non-drop. However, most (not all) of the newer editing workflows are now using 24fps timecode -- but always check with the post production supervisor before using it.
Although the new workflow does not always involve a 3:2 pulldown to correct for 23.976 to 29.97 additional frames, you still have to account for the 0.1% pulldown that occurs when converting from true 24fps to 23.976 video, and vice versa. Some editing systems can handle this automatically, or by selecting the proper checkbox during import.
The author suggests that you always include a tail slate along with the usual head slates on the first day of production, so that the editor can readily verify that the import settings are correct.
If anyone tells you to use a particular setting, make sure that you get it in writing and witnessed! That way you cannot be held accountable for problems that may be encountered by the production company later on.
Believe me, in today's world of video cameras running at 29.97, or 23.976, or true 24 fps -- there is a lot of room for mistakes. Ask, ask again, and get it in writing!
If they tell you over the phone, put someone else on the line to witness what they instructed you to do.
Running Modes
There are five different running modes for generating timecode.
The most basic setting is Free Run / Time of Day. That means that the internal timecode generator is like a clock, denoting the actual time of day. The clock runs continuously, whether the tape is recording or not. This is convenient setting to use, since anyone who needs to note the timecode numbers only has to gaze at his or her own wristwatch. Timecode errors between the slate and the recorders are obvious and easy to detect.
(It is interesting to note that some studios and producers object to time of day timecode because it is a permanent record substantiating overtime claims by the crew.)
The next most common setting is Free Run / User Set. This is similar to the above setting, except that the starting time for the TC generator is chosen by the user and does not correlate to actual time of day.
Commonly, the Hours digits are used to signify sound roll number. Spare wristwatches can be reset to match the timecode generator, if you have people on the set who need to keep track of the code.
Record Run timecode means that the generator stops when the tape does. Numbers increment during the Record mode, but remain frozen in time during pause or stop. The elapsed timecode is sort of like a tape counter, and is an indication of how many minutes have been recorded. Users often use the Hours digits to indicate reel number, rather than an "hour" of the day.
The difficulty in using Record Run is that all of the timecode generators (i.e. camcorder, audio recorder, timecode slate) would need to be physically connected to each other at the start of every take. This would necessitate a lot of cabling, or a complex set of wireless transmitters & receivers. Not for the impatient nor the feint of heart.
The last two "modes" are External and Jam-Sync.
External refers to continuously reading timecode from an External source and re-generating it onto the tape. If the External code should stop or be intermittant, the code being recorded would also be in error. (Many recorders are programmed with a self-protection that would automatically jam-sync to the last good code and begin generating new code in the absense of the External code.)
Jam-Sync (a.k.a. Set from External) means that the recorder synchronizes its internal timecode generator to match the starting numbers from an External source. When the connection to External is released, the internal code will keep in step with the external timecode source for a few hours or longer, depending on the accuracy of the timecode generators in question (recorder and source). Of course, Jam-Sync only makes sense in the Free-Run timecode modes.
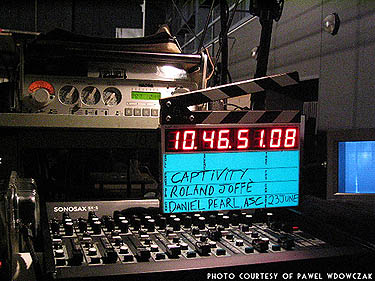
Timecode Slating
There's not much point in recording timecode onto the audio if there is no timecode reference on the picture.
In the case of video, timecode is normally recorded onto the video signal even if audio is recorded double-system (i.e. onto a separate audio recorder). Jam-sync all of the timecodes, and that will take care of basic sync (video word sync is another matter, but engineers take care of that on the big shoots). In addition to jam-sync, use either a traditional or timecode clapstick just for protection.
If there is no timecode being recorded onto the video (i.e. prosumer camcorders), or the timecode in the camera cannot be accessed -- then you should use a timecode slate so that the editor can line up the picture with the audio.
When shooting in film, a timecode slate should be used for matching up picture with audio.
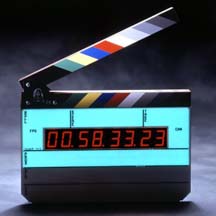 The standard of the industry is the timecode slate manufactured by Denecke, Inc. Older versions of these slates were "dumb" slates and could only display the timecode being fed into them via a cable. Early on, mixers began using Comtek transmitters and receivers (similar to a radio mic) to send the timecode from the recorder to the slate, thus eliminating the awkward cable.
Soon after, Mike Denecke came out with his portable sync box, which was a timecode generator that could be attached to the back of the slate. The addition of a self-contained timecode generator makes a slate into a "smart slate."
The sync box could be easily jam-sync'd to the recorder, and could hold sync for half a day. Of course, since re-jamming the timecode is so simple, mixers seldom wait that long.
The latest version of the Denecke slate, the TS-3, has a sync box built-in.
Obviously, when you are jam-syncing a smart slate to the recorder, you must use a form of Free-Run timecode, since the slate would have no way of knowing when you are in Record or Pause.
When doing sync playback, as in a music video, the timecode slate needs to display the code of the soundtrack being played back. Therefore, the slate must function as a dumb slate and receive a timecode feed from the recorder (playback source). This feed could come via a connecting cable (awkward!) or from a Comtek transmitter system (which is how it is normally done).
Make sure that you are familiar with how to use and set-up your timecode slate. Make sure that the internal settings for the slate’s timecode generator are set to match your audio settings in terms of frame rate and drop/non-drop.
If your camera will be using 24 fps (video rate), make sure you find out if it is actually just 23.976 or a true 24. Most of the time, it will be just 23.976.
In rare instances, you might need to cross sync 23.97 video with 29.97 audio (but that practice is no longer common). Some cameras, such as the RED, can cross-generate a 29.97 timecode for output to the slate and/or audio recorder. (It is possible, but can be tricky to the untrained.)
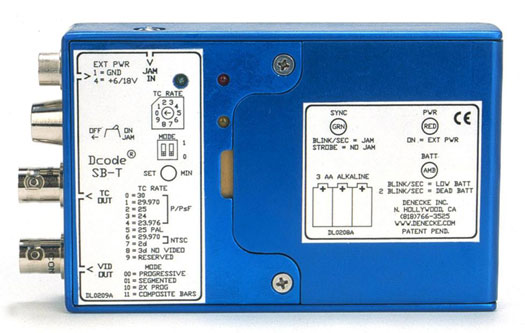 Otherwise, you would need what is known as a tri-level sync box, such as the Denecke SB-T (seen right), to convert the 23.976 code into 29.97. Usually, tri-level sync is only an issue of really big, multi-camera shoots. In those instances, a video engineer in a white labcoat will make sure that everything is set up correctly.
However, most production houses are not that exacting. Set your slate and audio recorder for 23.976 if an option, or 29.97 otherwise, and just make sure that the camera sees a few frames of the slate. Back in post, the editor can match the start of the audio to the timecode slate numbers, and let the editing computer deal with the housekeeping.
Timecode and Sampling Rates
The Nagra IV-STC stereo timecode recorder was an analog reel to reel machine. The tape runs at 7 1/2 inches per second while a timecode track is recorded down the center of the tape. During sync playback, a device known as a sync stripper isolates a sync pulse from out of the timecode signal and sends that signal to the resolver unit, which controls the precise speed of the tape by comparing that signal to a reference signal. Changing the setting (rate) of the timecode will cause a change in the playback speed. For instance, a tape recorded at 30 fps in the field can be resolved at 29.97 fps to slow it down in order to sync with a film-to-video transfer.
But digital recorders work differently. For example, audio is sampled at a precise speed of 48,000 times per second. That is what the 48k setting refers to. Audio is then played back at 48,000 times per second. To change the speed of the audio is not the simple matter of turning the tape reels slightly faster or slower, as in the case of the Nagra. Instead, complex electronic circuitry must be capable of re-sampling the digital audio at a different rate, a task much more complicated than it sounds.
Timecode recorded in digital tends to be cosmetic in nature, and is not used to control the sampling rate of the machine. It is possible in digital to even change the output timecode of a pre-recorded track without changing the speed nor the original timecode of that track!
In order to change both the playback speed of the tape as well as the timecode, two tasks must occur. The recorder must alter the sampling rate, and a new timecode must be generated, based on the sub-code of the tape. Merely re-setting the sampling rate (on those machines capable) or re-setting the timecode by itself may not achieve both tasks. Each problem needs to be adressed individually in the machine set-up. Not so much of an issue for live recording, but it does come into play if you are doing a sync playback or music video.
Up until just a few years ago, a common practice on film sets (24fps Native) was to record the audio at 48.048 sampling rate, but to faux stamp the metadata as 48.000. When the digital file is played back, the file is read at the slower 48.000 rate, thus slowing it down by the magic 0.1% pulldown. Today's newer editing systems do not require these faux sampling rates to fool them, but can just achieve the same pulldown result by checking the right box in settings.
User Bits
You can select to EDIT or manually enter User Bits. This is non-changing information that is part of the timecode data, such as a date, production number, or other simple value. It is important to always enter a value for the user bits, since timecode alone will eventually repeat itself after 24 hours. A unique value in the user bits area for each timecode cycle (24 hrs or less) will make it easier for post-production computers to identify material that otherwise might have the same timecode data. Some mixers, including the author, enter a hybrid of camera media information along with the date.
For example, we could enter CA for camera, 09 for the media drive, and 01 12 for the date.So the Users bits would read: CA 09 01 12 meaning camera drive 09, Jan 12.
Final Caution
Timecode recording techniques are simple in theory, but can get tricky in practice. Do not attempt to take on a timecode recording assignment on your own without spending a few hours being checked out by an expert on the idiosyncracies of the specific hardware package you are planning to use.
ALWAYS ask the Post Production Supervisor about what frame rates and timecode settings to use!