Pan
To the lower right of each input control knob is the PAN selector. PAN is similar to the left/right balance control of your home stereo system. It assigns each incoming signal to the left or right output.
But unlike the completely variable balance setting on your home system, note that the ENG 44 mixer only offers three specific choices: left, right, or center. You cannot assign a mic to be "slightly" to the left of center, nor "slightly" to the right of center! And that is how a location mixer should be.
Stop thinking of the two audio tracks in your camera as representing left ear and right ear. Instead, consider both of them as two mailboxes for storage of DIFFERENT information. As an editor, you do not want the same content to overlap two recording channels, because you want the option of manipulating the content of each track independently.
Say, for example, that you are interviewing two people. Person 1 and Person 2 are both on lavaliers, and you mix them so that both voices appear on both camera tracks. If one person fiddles with their mic while the other person is speaking, you will have mic noise under the dialogue. But if the two subjects are recorded on separate tracks while filming, then the editor could easily mute the noisy track without affecting the good track.
Later on, during the editing process, either track can be mixed with the other in any creative proportion, or "panned" to any stereo position whatsoever.
That is why there are only three options on a professional field mixer. Left track (with no overlap onto the right track); Right track (with no overlap onto the left track); or Center (essentially Monaural, with all sound going equally to Left/Right).
Tone and Slate
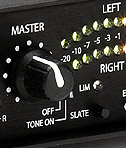 Located just to the right of the Master Gain control is the Tone switch. To activate the internal Tone Generator, just slide the tone control switch from OFF to TONE ON. An industry standard 1khz test tone will be output. You can raise or lower the output level by adjusting the Master knob.
Normally, we like to output the tone at zero level on the meter. Zero represents the loud threshold of dialogue. Then adjust the input level of your camcorder or audio recorder so that the incoming tone corresponds to the appropriate recording level for your device.
For example, on my Panasonic camcorder, I have found that zero tone from the mixer should line up at minus 10 on the camera. Why a minus 10? Because different meters are calibrated in different scales, sometimes for digital and sometimes for analog, and sometimes somewhere in the middle because the manufacturers don’t trust the end-users.
However, when I record to my digital audio recorder, I align the mixer’s zero tone to minus 18 on the audio recorder! That is because the metering on the audio recorder is set up to professional standards.
So how to know what settings are best? Experiment! Record stuff and play it back on your editing system. See if whispers are still audible and if shouts don’t distort too badly.
If you don’t have an opportunity to conduct record/playback tests, here is a useful trick. Set the audio input control of your camera to Automatic Gain Control (it might be a switch or it might be a menu setting). Have someone speak gently into a mic, adjust the meter level on the mixer to where you would normally have it, and then monitor the camera. See where the camera automatically sets its own volume for the dialog.
Reset the camera to Manual audio level, and adjust the camera’s input control so that your dialogue is at the same (camera) level as it was during Automatic.
By keeping the camera in Manual, you will not suffer a "pumping" of the audio level should your dialogue vary in performance or contain dramatic pauses. Automatic level controls are notorious for suddenly raising the level of background noise during silent passages, and then reacting frantic when someone resumes speaking.
Thirty seconds of zero tone from the mixer should be recorded at the beginning of each videotape (along with color bars). Indicate on your log sheet (or on the tape label) what the level of the audio tone on the "video" represents (e.g. "minus ten," etc.).
In addition to recording tone at the beginning of the tape, it is often convenient to punctuate the end of a take with two beeps. It makes it easier for the editor to separate audio takes.
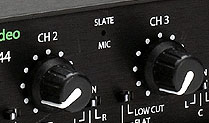 The Slate Mic is your personal mic. At the beginning of every tape, record the pertinent production information to identify that tape for the editor. Roll number, production title/number, date, audio speed or sampling rate, time code frame rate, and what audio level the tone represents.
During the production, you can i.d. the scene and take number at the beginning of each take. While the recorder is OFF, you can also speak instructions to the boom operator.