 Part 3: Recording with an external mixing panel
This section will provide practical advice for when you employ an external mixing panel in conjunction with the Tascam HS-P82 recorder.
It is very rare in professional filmmaking to record & mix your mics directly into a recorder – without the enhanced control of a mixing board. It might be okay to do that if you are just capturing a simple interview or sound effect – but the recording of high quality dialogue on a theatrical project entails a much greater threshold of control.
(Note that some reality shows are recorded only as isolated tracks, and it is left up to the editors to sort it all out as they build the storyline.)
During the actual production, the soundmixer relies upon one or two boom mics to pick up most of the dialogue along with a necessary degree of background ambiance and live sound effects. When the boom is unable to access some areas in the set, the task relies upon fixed or planted mics to cover those difficult spots. In addition, some actors may wear hardwired or wireless lavaliers.
In a live mix, all of these mics need to be continuously adjusted in order to provide a realistic perspective & texture, along with avoiding dropouts or echo caused by the resultant phase cancellation of multiple mics hearing the same sound and mixing them onto the same track.
Multi-track recording allows us to capture the live mix as well as the “isolation” tracks from all of our on-set mics. It is a way to have our cake and eat it too. During the production, live mics are faded in and out to create one or two tracks that will serve as the production audio soundtrack for dailies/playback, and for the editor to use during the creation of the “picture edit”. At the same time, iso tracks are laid down that capture every important mic at optimum volume, devoid of any fader movement.
After the story sequences have been assembled, cut, and tweaked into the “picture lock”, the footage is turned over to the sound editors to work their magic. At this point in time, elements in the production soundtrack may be edited, enhanced, or reconstructed from “isolation” backup tracks. Failing that, portions of the dialogue may need to be completely re-recorded in a “looping” or ADR session.
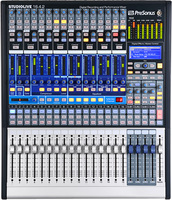
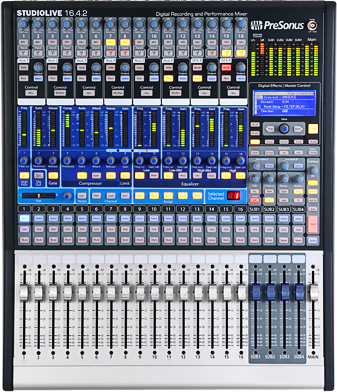
Connecting the mixing panel
When an external mixing panel is used with the Tascam, it is not practical to use the internal settings to live mix all of your inputs to the master LR tracks. It is physically too difficult to wrangle the virtual knob that controls the output level of each channel – quickly and conveniently!
Therefore, this workflow bypasses that feature. Instead, we rely upon the capabilities of the mixing panel to produce the master mixdown.
Set the inputs of the Tascam to LINE LEVEL. The MAIN out as well as the DIRECT OUT of the mixer are almost always line level out. If for some reason your mixer is NOT line level out, then set the Tascam inputs accordingly to MIC or MIC ATTENUATED.
Connect one output from your mixer’s main output (either L or R) to Channel 1 of the Tascam input. Most soundmixers only take one (monaural) feed from their board; although you could opt to take a 2-track (stereo) feed and go into Channels 1 and 2, but that would mean giving up one less iso track.
Next, take feeds from the DIRECT OUT connections from your mixer of mics 1 thru 6, and plug them into the Tascam inputs 2 thru 7. The direct outs from your mixer need to be post trim/gain and pre-fader.
In other words, you should be able to set the initial microphone volume going into your board from the small trim or gain knob of each module, while the faders of each module are completely closed. Opening the faders should only control how much sound makes it to the main L/R output of the board, but should NOT have any effect on the direct outs. If moving the sliders does effect the direct out levels, then all of your iso tracks will share whatever good or bad mixing decisions are made during a take, and might not be suitable for rebuilding the soundtrack during editing.
Determine if your mixing board is suitable for accessing the direct outs. You may need to step up to a higher caliber board.
You also need to check whether or not your Direct Outs are pre or post EQ. If the directs are pre-EQ, then it is okay to use your mixer’s settings to match up the tone of your mics. But if the EQ adjustments show up in the Direct Outs, then be very cautious about using the EQ on the board, as that will affect your ISO’s.
On a major production, it doesn’t take much to exceed 7 microphones total in a scene. Typically, there will be one or two boom mics, perhaps one or two planted mics, and then lavaliers on all of the main characters.
So if the Tascam only has 8 inputs, and one of those is already being used for our Production Mixdown, how do we “iso” all of the other mics?
That is why we only plugged direct outs into Channels 2 thru 7, or even 2 thru 6. Utilize Channel 8 (or Channels 7 and 8) for feeds from the Aux Out from the mixer.
Not every character wearing a lavalier needs their own iso track all the time. As a soundmixer, you could group a few minor characters together onto a single Aux track; or you could select characters that never appear in the shot at the same time (example, Actor A has a line in the beginning of the shot, and Actor B only has a line near the end of the shot) and record them onto the same audio track.
Use the Aux Outs as a means of grouping these “excess” microphones.
Generate reference tone in your mixer to zero VU level on an analog board, or appropriately lower on a fully digital unit; and read the corresponding levels on the Tascam. They should read around –20dB to
–15dB.
If the line level input to the Tascam reads too low, you can adjust it by going to the System Setup screen and selecting a different Ref Level.
Use the Channel Setup screen to rename your Tascam tracks for easy identification, such as: Mix, Boom1, Boom2, Sink (location of a planted mic), Joe, Mary, and so on.
On Channel 1, which represents the live mixdown, you want to send its output over to the 2MIX master LR tracks. If it is a monaural mix, go ahead and center the pan pot so that the single track mixdown can be heard on both master LR tracks. If you are recording a 2-track mixdown from your mixing panel, then go ahead and send each of them respectfully to only L100 or R100.
Otherwise, use your external mixing board as you normally would. Connect your boom operator to an Aux Out or Comm Out, connect your wireless monitoring system (for the Director, Script, et al) to their Aux Out, and so on.
Remember, use the trim/gain pots on your mixer to adjust the output level for the iso’s being sent to the Tascam. Use the faders to open, close, and adjust the levels of each mic in your live mix. Very often, an actor’s lavalier might not be used in the mix, but will still be present in all its entirety on the iso track, should the editors want to access it in the future.
Note that it is beyond the scope of this users guide to explain to the novice all of the basic functions of portable mixing panels and how they are used for film and video production. This guide assumes that you are already familiar with the workings of whichever make and model of the particular external mixing board that you intend to use with the Tascam recorder.